| HOME |
Letters to the editor |
Safety | NEWS | Product Reviews | Technical Notes | Skibiker Profiles |
Bulletin Board |
Travel Guides |
|
|
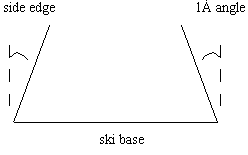
Skibike Ski Tunning 2/16/05 Randy Kimball Albuquerque, NM There are as many ways to tune skis as there are to make pizzas! When I took on the task of trying to learn how to tune my own skis, it quickly realized I needed to be careful what I asked for. For example, "What basic tune set up would you suggest on a ski?" will get you a plethora of different answers. After some research and time experimenting on my ski bench, I have come up with what I feel gives the best tune for shaped skis. (This work was done on a WinterXbike kit. I have not tried this tune on other Manufactured ski bikes but I believe it would be a good baseline for any skibike running a shape ski with lots of side cut.) For those of you that feel confident tuning skis, please read on. If you have no experience, do some research and reading. It is not rocket science, unless you are trying to shave off .001 of a second for races. Take your time, study and try a bit of self discovery. I started on my "old rock" skis first, and not my really nice ones! :-) To start out, I want to say that this is not Ski Tuning 101. This article is intended for those that already have some degree of experience with tuning skis, or who are willing to tell the guy at the ski shop how you want your skis tuned. I have found that the hardest thing about ski biking is working to not catch that outside (or downhill)edge. Just like snowboarding, When you catch an outside edge on a skibike, you go down fast and hard. (Emphasis on 'Hard'! I'm talking seeing *stars* and feeling woozy for a bit). I have found the tune below to help minimize the edge-catching and allow the skis to easily be moved or float into position. You need to start with the basics. Clean the base, de-burr the edges, and flatten/repair the base. This is always the foundation of a good tune. Next, I get to work on the base edge or bevel. I have found a good win-win with setting the base to a 10 base bevel. Start at .50 base bevel and work up to 10 after a bit of trail on your particular bike. This helped initiate turns on the front ski and movement of the rear ski. I notice that the rear ski will almost float until I set an edge. After you get the base bevel between .50 and 10 degree, move on to the edge bevel. |
|
|
||
Next, work on the edge bevel. I found, again, that somewhere around 10 edge bevel allows me to better feather the edge without grabbing and unwanted edge. Don't be fooled, I can set a hard edge if needed! See the detail below about getting your edge bevel set.
|
||
|
||
Here is trick I learned to help stop the high speed "Wander" or "Chatter" that is common place on shaped skis. Use a stone or a piece of very fine metal sand paper, and dull (de-tune) both tips and tails about 2-4 inches in from the ends on the base-to-snow contact points of the ski. This will help quiet the skis at high speeds. |
||